Saturday, December 4, 2010

"Adventures" in Diabetic Baking


So today, I decided I need to test the diabetic recipes I have picked out for my Grandmother's upcoming birthday party. She loves her sweets, even though she will swear up and down that "she does not have a sweet tooth." When she was first diagnosed with diabetes, or even just warned to watch her sugar, at her house would always be an Entenmann's cake or something delightful under her cake dome and a bag of Snickers minis in her refrigerator. "They are just so damn good!" What could you do but smile and shake your head? Well, as time has gone on she's become more careful about her sweets and watching her sugar. Her 90th bday is coming up in January, and I figured what could possibly be a better cake than a Snickers inspired cake? Then I thought portion control and ended up with Snickers cupcakes.
I have never baked with anything other than real sugar before. Ok, once I did...with Splenda for a diabetic coworker. They were the driest brownies ever. He was really nice about it, but I was hoping he didn't eat it and just threw it away!
I have an amazing chocolate cake recipe that turns out perfect every time. After finding a diabetic chocolate cake recipe online, I decided to go with my recipe and exchange the sugar for the Splenda Sugar Blend I had picked up. The cake actually turned out decent. Moist and sweet. In fact, I think next time I'll cut back the sugar substitute a little more. I made 12 cupcakes for the Snickers cupcake test run, and one 8 inch cake with added cayenne pepper and cinnamon as an attempt at a Mexican Chocolate cake.
I started coring the cupcakes. The vision being this:
Core cupcake
Add a few whole Roasted Peanuts
Fill with Dream Whip/Brown Sugar Substitute concoction
Put the cupcake top back on
Frost
Sprinkle with chopped Roasted Peanuts

I got to the frosting point and decided hey I'll try out my frosting recipe and sub the sugar again since the cake worked out so well. Not such a great idea. I'm not a chemist and I don't know what properties changed but the Splenda ruined stuff. The cream/sugar based never congealed with the butter/cocoa mix. I had to taste it just to see how bad it was, and actually it tasted really good. But in the trash it went.


It was a good thing I had picked up the Pillsbury Sugar Free cake mix and frosting at the grocery store while I was there today. It was honestly just for comparison sake, but ended up being a good backup. I really don't care for the frosting but I was in a pinch and frustrated. Got out my pastry bags and started decorating the cupcakes. The way I frosted them, I went through one "can" of the store bought frosting for 12 cupcakes. It was too sweet for my taste, so I sprinkled some sea salt on the top for good measure, and finally sprinkled the chopped roasted peanuts. They look pretty, but we'll see how they taste as a whole tonight at a friend's house. Fingers crossed!!
I sure am glad I decided to do a test run...my last resort Plan Z is to go get some sugar free cupcakes at the bakery in the next town over. Let's hope that doesn't happen.
Time to figure out some normal frosting for my Mexican Chocolate cake.

Sunday, November 7, 2010

Cranberry Nut Roll


Since buying my jelly roll pan, it hasn't had much play. I made a delightful pumpkin roll a year or two back and since then it's just been another one of my unloved toys. I decided it was time for a romp!
Found this recipe for Cranberry Nut Roll, and it sounded like the perfect addition for my Fall bakefest.
The recipe is pretty simple, and on the site it claims that it is healthy. I can buy into this, I suppose. I was surprised at the separating of the egg whites and egg yolks and then folding technique. There was actually not much flour in the roll mix itself, so I guess this makes it more of a meringue base and thus lightening it up. I also used the lower fat cream cheese in the filling, but did not budge on the real butter.
As I was reading through the recipe, I realized I did not have any wax or parchment paper to put on the pan. I have those neat silicon pan liners so decided to have a go with that. It turned out just fine, the only funny part being you could see where I've used it to bake cookies before. No one but me noticed, of course.

This turned out to be the office favorite. My Jelly Roll Pan dances in delight of the news.

Saturday, November 6, 2010

Gypsy Picnic Trailer Food Festival


Trailer food seems to be a thing here in Austin. I've been to a few, but when I heard there was going to be an event where a good number of them will be in the same place with sampler sized stuff, I could not resist!
The Gypsy Picnic Trailer Food Festival was at the Auditorium Shores just south of Town Lake. I was leary of the parking situation, as I have not conquered that annoyance factor since moving here, but luckily my friend gave some excellent directions to a FREE lot within walking distance. After a morning Zumba class and a short walk to the festival, I was ready to eat!
The place was packed. This was the festival's first year, so lines were really long. I'm glad we decided to go for a lunch outing rather than a dinner outing, as trailers were already starting to run out of food.
Our first stop was Coolhaus. The line was long, but it moved relatively fast. We got two mini ice cream sandwiches - Chocolate Chip cookies with Bacon Chocolate Chip Ice Cream and Ginger with Lemon. They were the perfect size and they were divine! Definitely inspired to use the flavor combination of lemon and ginger. Their lemon ice cream had such a nice lemony flavor and was perfect for their strong ginger cookies. The Bacon Chocolate Chip was also delicious. I was happy that the bacon flavor was not so overpowering. If you've ever had the Voeges Bacon Chocolate bar, you know what I'm talking about. The salty and sweet was just a nice combination. The mini ice cream sandwiches were a nice cool treat for the perfect Austin day we had!

There were lots of people who brought their dogs. I couldn't believe how many Ridgeback mix dogs I saw, and I was thrilled! I was just glad it was them and not me, my guy would have been way too excited for an event like this. Some fools were even carrying their chihuahuas around...which I thought would be a difficult feat in trying to consume trailer goodies and also care for the little dogs. To each their own.
Next we stood in line for the Pick Up Stixx trailer. The pierogy caught my eye, so we stood. I think my friend and I were easy marks, as everyone seemed to cross through the lines in front of us - didn't matter where we were standing. Everyone was totally friendly though, so no worries! There were quite a few comments about how long the lines were, my favorite being how the line for beer is shorter than the line for food! We finally got to the Pick Up Stixx table, to find out they were in between batches of pierogy and there was a line to the right to stand and wait for them to come out. In the meantime we had their Greek Chicken Croquette. It looked like a mini Wimpy burger with a patty in between made of chicken, spinach, rice, and feta. It came with a side cucumber yogurt sauce. It overall had good flavors, I removed half of the bun because I felt like the bread took away from the patty. The yogurt sauce was an excellent add. We finally got our pierogy, which was also served with a packet of sour cream.
Since our stomachs were sending up the "I'm done" flair and the lines seemed to get longer by the second, we found the shortest line at the time being at what I want to say was The Flying Carpet. I can't quite recall but we were in the South Congress area of the festival so that is what I remember. On our way from Pick Up Stixx to The Flying Carpet we noticed several trailers were already sold out of food! It was probably about 1:30-2pm at this time. The shortest lines were the coffee trailers, and you could literally walk right up to them.
While in line at The Flying Carpet, we opened our foil packaged pierogy. To my surprise it had been deep fried. I was curious how they would pull this off anyways, and I was wondering why it was taking so long - well know I know, because they had to deep fry them! It was kind of dry on its own, the potato filling was just that - I didn't taste any other flavors in it. The sour cream came in quite handy and saved the day for the pierogy. The only other time I've had sour cream on my pierogy was in San Francisco at Cinderella's Russian Restaurant. I'm used to butter, salt, and pepper.
At the Flying Carpet we got the Medjool Date. It seemed like the right thing to get to level out our sweet-salty-sweet pattern. The date was amazing, and again something I'd like to try out on some friends. Basically it's a date sliced in the middle, stuffed with almond butter, and sea salt sprinkled on top. I loved the combination of salty and sweet - and really to me, this was more of a savory dessert, and a not so guilty one at that.


The people kept pouring in as we were leaving. It was lovely weather for this event, and I think since it was the first year, the kinks will be worked out over time. I'm not really sure how they would resolve the line problem other than getting more trailers to jump on the bandwagon. Still a good time outside!

Pumpkin Brownies


First thing I like about this recipe is that it tells you honestly how much effing butter is in the recipe. If you’ll recall my previous Cranberry Oatmeal Cookie recipe from the Quaker lid, it states 1/2 cup of butter, plus 6 tbsp. For those of you who might not know... 1/2 cup of butter is 8 tbsp. So seeing the “plus 6 tbsp” just kind of made me giggle.
Anyhoo, this recipe has you half the base and then you make one half chocolatey goodness and the other pumpkiny goodness. Normally I’m not a fan of nuts in my desserts, but I felt like the walnut bits in the pumpkiny half were a good addition. Plus, HEB helped the decision a little bit by selling already super chopped pieces of walnuts. (Hey, don’t judge...Mama needs a good cutting board!)
You layer one on top of the other and then take a knife to swirl it around. Pretty simple, and if it turns out anything like the batter on the spoon was (after it was retired from use, I promise!)...then these are going to be simply delightful.
These were my personal favorite from the fall baking adventure, so I'll be making mass amounts to take home with me :)

Recipe for Pumpkin Brownies on AllRecipes

Tuesday, November 2, 2010

Pumpkin Chocolate Chip Cookies

I first tried this recipe for Pumpkin Chocolate Chip Cookies right before I started this blog. And second time around, this recipe is definitely a keeper (printed out and put into my recipe book). The cookies turn out like muffin tops or mini cakes! Moist and just perfectly spiced with some drops of chocolate. The only thing I can say that is mine about this recipe is my VIP tool for today, Pampered Chef Medium Scoop. I don't even remember when I bought this sucker...it was either high school or college. But it makes drop cookies a cinch.

Monday, November 1, 2010

Cranberry Oatmeal Cookies


Now, if there's anything I've learned about Oatmeal cookies over the years I've been baking them is...nothing beats the recipe under the Quaker lid. Knowing I had a 2 lb bag of Craisins at home (Costco, I <3 you!), I just pulled the lid on the bin of Quaker to peek at the rest of the ingredients for the cookies. Put the Quaker bin in my basket and picked up the brown sugar.
Nothing fancy, just replaced the raisins with Craisins. I already know they will be a hit. They are delicious!

Recipe from Quaker
You'll get my butter giggle in a later post...

FYI:
Not-as-fatty Quaker Oatmeal Cookie Recipe

Sunday, October 31, 2010

There's pumpkin spice everywhere...must be time for Fall!

I think if I were to survey my friends, fall would most likely be the favorite season. Back home in Tucson, fall lasts about a week. The weather is gorgeous and you temporarily forget the heat you endured for the past several months. There's no environmental/visual cues that say "hey, it's fall!" One of my favorite things to happen with it's fall though...is pumpkin spice EVERYTHING!
So here in Austin, it's been gorgeous. The weather is similar to back home, except it's not as hot during the day and when the sun goes away it is really cold. It's been going back and forth between warm weeks and brisk weeks, and I've been enjoying it. Walking around the neighborhood there are acorns of all shapes and sizes on the ground. Leaves are somewhat dropping, although it seems the trees are as confused as the weather is switching at a whim.
Fall, pumpkin spice, night = cold, all these things get me excited and leave me in anticipation for the holidays.
I figure what better way than to test out some desserts using fall ingredients. I chose to play with pumpkin and cranberry.

I'll start the first off with my flop...the Pumpkin Fudge.

Pumpkin Fudge
I haven't made fudge in years, and I have never tried or heard of Pumpkin Fudge. Finding this recipe made me want to attempt it immediately! Of course, I had to find the right day to squeeze in a bakefest, so I have already purchased the mini Wilton fall cookie cutouts in anticipation of making leaf and acorn shaped pumpkin fudge.
So I gave this a go last night. The recipe seemed easy enough. I even added some nutmeg, cloves, and ginger to the recipe to spice it up a little bit more than just the cinnamon it called for. Started cooking, and it smelled great. It seemed to reduce down to something recognizable as fudge. Put it on my cookie sheet and tried to flatten it out. Watched something on TV for 10 mins, came back to it...and it was hard as a rock! I think I used too much heat for the time it called for. It was fine as Pumpkin Brittle, I suppose. After breaking off a corner and nearly breaking my teeth, I decided to scrap the whole thing. I really should have taken a picture, but I'm sure no one wants to see the contents of my trash bin. It'd be pretty funny though.
Guess my mini Wiltons are going to be cutting acorn and leaf shaped cheese instead. mmmm.

Saturday, October 9, 2010

I miss Shishkabab House...so, Chicken Shawarma

It's been almost three months since I've had my last shawarma fix at Shishkabab House in Tucson, AZ. Chicken Shawarma with seasoned sliced red onion, hummus to die for, warm pita bread, and a fragrant yellow rice - to be exact. I have yet to find a Mediterranean food place here in Austin that I can run to when I am craving Mediterranean goodness. So, of course...I went in search for a recipe.
I've never attempted shawarma before, so I was really excited to try it out!

I found this recipe on AllRecipes: Chicken Shawarma

The recipe was really easy to follow and I broke it down to a few steps at a time rather than doing everything all at once. An observant reviewer was also kind enough to leave a recipe on how to make the Mixed Spice that is noted as an ingredient in the recipe.

Mixed Spice

1/4 tsp. powdered allspice
1 tsp. black pepper
2 tsp. cinnamon
1/4 tsp. ground cloves
1/4 tsp. nutmeg
1 tsp. fenugreek
2 tsp. powdered ginger

Combine all spices together in a small bowl. He recommends using a mortar and pestle. I kind of mushed everything together with my spoon. It obviously makes more than the teaspoon necessary for the recipe - but save it for the next time! (Which trust me, you'll want to make this again!)

The only other things I've used differently were using boneless skinless chicken breast and simply marinating the chicken overnight in a ziploc bag.

First night, I made the Tahini Yogurt Sauce. I like to use fresh pressed garlic in my yogurt mix recipes, and I find they "ripen" beautifully the longer you allow them to sit in (mixed) in the refrigerator.

The next morning after my chicken had thawed, I mixed the marinade ingredients in a bowl, then put the chicken and the marinade in a large ziploc bag. Folded the bag over, pressed out excess air, and placed on a plate to go into the refrigerator.

With marinades, I like to have the meat marinading overnight. In this case, I had it sit there until the following evening.

Next, I emptied the marinade bag into a glass baking dish, and followed the recipe on cooking instructions.

The recipe came out fantastic! I just sliced up all the chicken I baked and put it into a bowl. The Tahini Yogurt Sauce that I had prepared had a thick consistency, so I had thought about quickly pan frying the chicken with the sauce just to warm it up a little. I didn't do this - but will try with leftovers!

I wanted to make the Yellow Rice, but darn it - with my entire cabinet of spices, I do not have turmeric!! Had to settle for brown rice and was happy.

Sunday, September 19, 2010

Queso Fresco's next life - Quesadilla Salvadorena


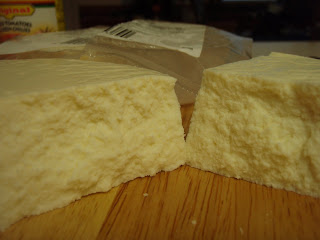
So, I had 6 oz of Queso Fresco left over from my failed queso attempt - which I might add, was delightful in its own way...can't really screw up cheese! If anything, the failed queso attempt introduced me to Queso Fresco and the fact that it doesn't really melt. I'm not sure if Farmers Cheese is around here, but if I am unable to find it, Queso Fresco will suffice just fine after it is grated down.

I asked Mr. Google what I might do with the rest of my Queso Fresco. A lot of recipes came up where it's used as a garnish on top of some kind of Mexican dish. I had a few thoughts like, oh I wonder if it could be used in a cheesecake? The cheesecake recipe I did find called for more cheese than I had. Then my thought process derailed and I got onto breads. I think some Jewish holiday has recently passed or is in effect and that reminded me of challah and how delicious it is. I know, it's a completely different tangent, but you have to understand this is how my brain works. I started Yelping challah around town, and that's when I started reading about bakeries. While reading over some reviews, I got inspired to google for Queso Fresco and Bread recipes. And that is when I ran across a recipe for Quesadilla Salvadorena.

The recipe calls for 1/2 lb of Queso Fresco, but I figured I'd go ahead with it anyways, 2 oz shy of what I needed. The fun part was grating this cheese. The texture of it after it was done reminded me of that instant snow they have in the malls during Christmas time! The other ingredients of the recipe were all on hand and it was a cinch to put together.


I didn't have two loaf pans to bake them up in, so I used a loaf pan and the rest in an 8x8 pan. The important thing to remember is just to keep an eye out as one will bake up faster than the other. It was about 23 minutes when the 8x8's toothpick came out clean and it was a golden yellow on top. The loaf pan took about 10-15 minutes longer and had a beautiful golden brown color on top.


The texture of the cake is quite dense, but perfect with coffee. I've only had a piece from the 8x8 since I'm halfing the loaf and visiting the neighbors! It's Sunday after all :)

Sunday, September 12, 2010

For the love of queso


Happy first post!
This topic came easily to me, but then as I started cooking, I realized...this might be a quest.
I just moved to Austin the beginning of August. After getting lost trying to find a fax machine, I finally found one and decided to get my internet fix at the coffee shop next door. Looking at the menu to pick out a guilt purchase, I saw nachos, with cheese, beans, jalapenos, pico, etc. You could add an optional avocado or queso. I asked the waitress, "What is queso?" She couldn't answer, which was kind of strange.
I've only known queso to be Spanish for "cheese." Later in my first week in town, I kept seeing queso everywhere! Queso, queso, queso. I even had a queso burger and had no clue what the heck it was other than cheese.
Turns out, it's as simple as that. It's a Tex Mex thing. You get chips and salsa at a restaurant (might I add the salsa has been DREADFUL here), but you order a side of queso with it. A cheesy dip thing!
Since this discovery, I've been queso crazy. Pretty much anywhere I've been, I need to get the damn queso. Addicted? Probably. I am determined to find
the best queso in town!
A month into it, I have yet to find the Holy Grail. However, I've experienced two disgraceful types of queso. One being melted velveeta that congeals immediately. The other being some runny watery substance with a hint of cheese flavor.
Then the next logical thought hits me. "I can make this stuff. I can make queso!"

Tonight, I tried...and failed.

I went to the local grocery store and started looking at the cheeses. I looked at the usual suspects, deciding which to pick out. And then there was a whole row of Mexican cheeses, but more importantly...cheeses named
queso!
This was my mistake. I picked up a round of Queso Fresco. Knowing it was a gamble, I had to ask the almighty Google what the heck I just bought. Turns out it's like a farmer's cheese. And worse, it says that it has a hard time melting! CHIHUAHUA!
I stay the course and try it out...

Flubbed Queso - Take Uno.

1/2 cup chopped onion
1/2 tbsp olive oil
Ground White Pepper (to taste)
6 oz Queso Fresco
1/2 cup shredded Mexican blend cheese
1 can Rotel Tomatoes
8 oz Sour Cream

Chop onion. Take 1/2 cup and saute in skillet with olive oil over medium heat. Add ground white pepper to taste. Once they are translucent or "caramelized" (heh.) remove from heat.

Cube Queso Fresco. Add to saucepan along with shredded cheese over low to medium heat. After a while, (for me, it was the shredded cheese was melted), add onions and drained can of Rotel tomatoes. Stir around and break up Queso Fresco with the spoon. Eventually it will melt down a little. Then add your sour cream and mix. I waited until mine simmered a bit and then turned off the heat.

I still had to help myself to a small bowl to see how it fared. I can't say it was terrible - but it was pretty bad. I'll probably use the rest over a pasta dish or egg omelets.

This isn't over, queso.